
Deep Hip Rotator Release
- Nicole Longwell

- May 18, 2016
- 2 min read
Updated: Dec 24, 2025
🦵 How to Perform a Deep Hip Rotator Release for Pain Relief and Mobility

Tightness in the deep hip rotators — including muscles like the piriformis, gemellus, obturator internus, obturator externus, and quadratus femoris — can contribute to pain, limited range of motion, and issues like sciatica or general hip discomfort. The video linked above offers a clear demonstration of how to release these deep hip muscles using specific manual or self-release techniques, helping restore mobility and ease muscular tension.
Many people spend hours sitting, running, or strength training without addressing the smaller but powerful deep hip muscles. When these muscles are tight, they can pull on the pelvis, compress nerves (such as the sciatic nerve), and limit hip rotation — which affects everything from gait to athletic performance. Learning how to effectively release these muscles supports better biomechanics, less pain, and improved functional movement.
➤ Why Release the Deep Hip Rotators?
Reduce pain and nerve compression with deep hip rotator release: Tight deep rotators can squeeze nerves, especially the sciatic nerve, leading to pain that radiates down the back of the leg.
Improve range of motion: Releasing tension around the hip joint helps you rotate, bend, and extend with greater freedom.
Enhance posture and stability: Hip mobility influences pelvic alignment and spinal mechanics, which affects overall posture and low-back health.
Support athletic performance: Runners, cyclists, and lifters often benefit from hip release work to complement strength training and reduce injury risk.
➤ Common Deep Hip Rotator Release Techniques
The video demonstrates approaches that may include:
Manual Release – Using thumbs, fists, or elbows to gently press into tension areas while slowly breathing.
Self-Myofascial Release Tools – Using a ball (such as a lacrosse or massage ball) placed under the hip rotator area while lying down or seated to apply targeted pressure.
Guided Movement + Stretching – Combining pressure with controlled movements to help the muscle relax and increase range.
➤ How to Perform a Basic Self-Release (Example)
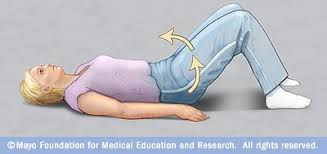
Positioning: Sit or lie on your back with a small firm ball placed under the outer hip near the deep rotators.
Slow Pressure: Gently lower your body onto the ball so you feel mild pressure — not sharp pain.
Micro-Movements: Bend and straighten the knee slightly or rotate the hip slowly to work deeper into the tissue while breathing deeply.
Duration: Hold for 60–90 seconds in areas of tension, then move slightly and repeat.
The goal is to encourage relaxation of the muscle and fascia, not force it. Breathe slowly and adjust pressure as needed to stay comfortable. Over time, this type of release can help improve hip rotation, decrease discomfort, and support functional movement patterns.
➤ When to Use Hip Rotator Release
This technique can be valuable:
After prolonged sitting
Before or after exercise
When experiencing hip or sacroiliac discomfort
As part of a mobility or recovery routine
Always proceed gently, and stop if you experience sharp or severe pain. If symptoms persist, consult a movement professional or physical therapist.

Comments